Time for the part two in this series which is going to be about SQL backups on a virtual machine in Azure.
Extra backup disk
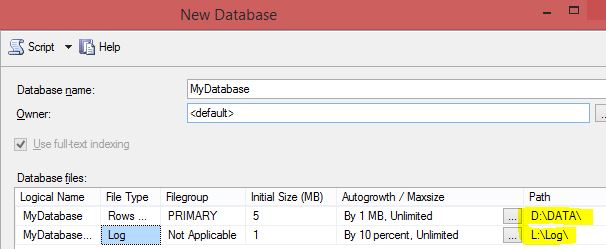
The way I handle SQL backups is to first look at the SQL installation itself and on the disk hierarchy. When you set up the database you should always separate the data files and the log files one separate disks.
Reason to Place Data and Log Files on Separate Drives
And on top of that I would like to add an extra disk to store my backups on. I don’t want to store them on the same disk as the data files cause of possible disk failure and I don’t want to store them on the same disk as the log files cause of performance, hence the backups get their own disk. By now maybe some smartass is thinking “Hey, he is talking about azure isn’t he? Aren’t all the disks there built on several raids to prevent just disk failure so that shouldn’t be a problem”. The smartass is probably right, but I like to this anyway. Call me old-fashioned 😉
EDIT: I found this link about SQL performance in Azure: Performance Best Practices for SQL Server in Azure Virtual Machines
Automatic backups
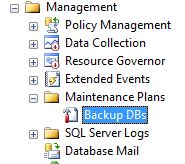
Ok, we got a separate disk. What do we need more? We need to set up automatic backups that takes full backups every night and log backups every hour. To do this we need to create a maintenance plan that takes care of this. Luckily there is a Maintenance Plan Wizard that is straight forward.
If you suddenly realise that you don’t have the possibility to make fancy backup jobs with maintenance plans since you are running the SQL express version don’t panic. Just read How to schedule and automate backups of SQL Server databases in SQL Server Express instead.
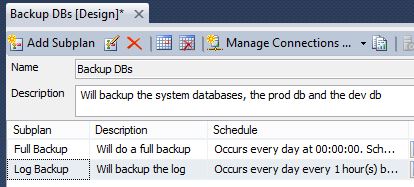
Now we have a maintenance plan named Backup DBs that contain two subplans, one for creating full backups and one for creating log backups.
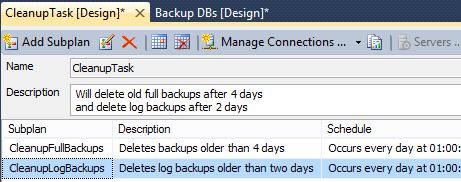
Cleanup Task
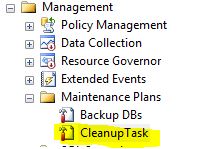
Now you might wonder if it will keep all those backup files that increases day by day and consumes a lot of harddrive space. The answer is yes! That´s why we need a cleanup maintenance plan that erases full backups older than five days and log backups older than two days.
Notifications
Last step is to create notifications so we know when our backup fails.
“You set up backups to impress your boss, but making sure they run is how you keep your job.”
First of all, if you don’t have SMTP address you can use from Azure i recommend you to get your own SMTP server. We are going to use it to send emails from Azure.
There is three ways to setup notification of SQL backups:
- Add a notify operator task in the maintenance subplan
- Add notification to the SQL Server Agent job
- Add an event task that notifies a user in the task scheduler
Here I’m only going to cover the first two ones. The third I will cover in a separate blog post but first we need to create some prerequisites
Database Mail
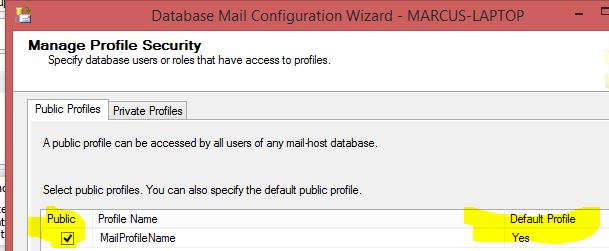
Before we can send mail from SQL we have to set up the mail configuration. Create a mail profile and then add an account. Set the profile to be public a default.
I would rather suggest that you set the profile to private and add map the user login to the msdb db and tick the DatabaseMailUserRole since when you have a public profile all the db users have the possibility to access the profile and send emails. BUT! After spending two hours to get that to work on two different servers I bail… I even found a bug but more about that later.
It is pretty easy to set up the mail profile and account by using the Database Mail Configuration Wizard to set up the mail.
You can read more about Database Mail on msdn.
Once you finished with the profile and account, right-click on the database mail and select “Send Test-Email”. It it doesn’t work you got a problem.
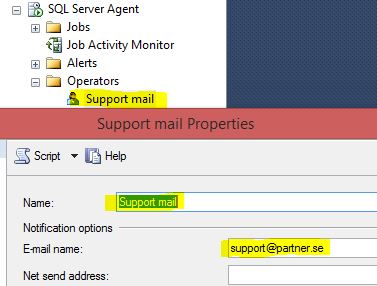
Operator
On the SQL Server Agent you create operators that should/could be contacted after scheduled jobs have been running. Meaning, if we would like to send a notification by email we need to add an operator with an email.
If you don’t know how to do it read Create an Operator on msdn.
Once you finished it will look like this:
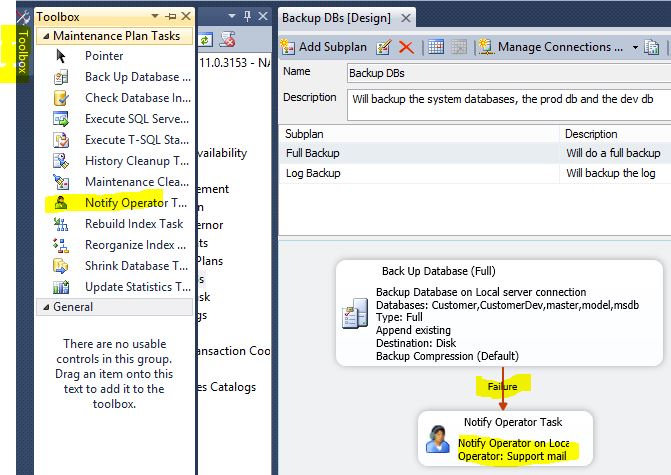
Alt. 1: Add a notify operator task in the maintenance subplan
Here we add a Notify Operator Task to the maintenance subplan that will execute if the job failed or succeed. I always add to send a notification when the job fails but for testing purposes I add a notification if the job succeeds just to see if the notification works.
Modify your Backup DBs maintenance plan and choose the first subplan. Drag and drop an Operator task to the subplan and connect them with a failure action.
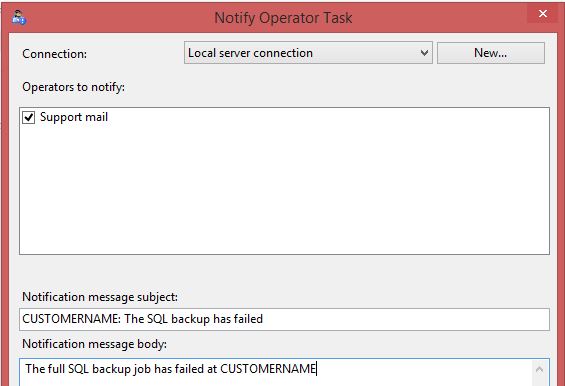
Choose the operator you created before then fill in the subject and email text.
Add a Task Operator to the second subplan as well. Save and exit the maintenance packet and go to the SQL Server agent. Now you can find the SQL Server Agent jobs that has been created from the maintenance plans we created before.
We now want to test drive our new mail function and make sure it’s actually sending mails but the Notify Operator tasks that we just created only executes on fail so what to do now?
Well, it is actually quite simple. We go back to the maintenance plans and create a new one (blank) and then we add a Notify Operator Task. Set the your operator, save and go to the SQL Server Agent again, refresh, right-click on the new job and choose Start Job at Step… If everything goes well an email will be sent to the operators address.
If the job failed, right-click the job and choose View History. If you get the following error message it is the bug that I earlier talked about:
The job failed. Unable to determine if the owner (USERLOGIN) of job SendMail.Subplan_1 has server access (reason: Could not obtain information about Windows NT group/user ‘USERLOGIN’, error code 0x54b. [SQLSTATE 42000] (Error 15404)).
Solution: Right click the job, choose properties and change the owner to sa. Save and try again.
Otherwise troubleshoot by checking if the mail profile is public and have default = yes.
Alt. 2: Add a notification to the SQL Server Job
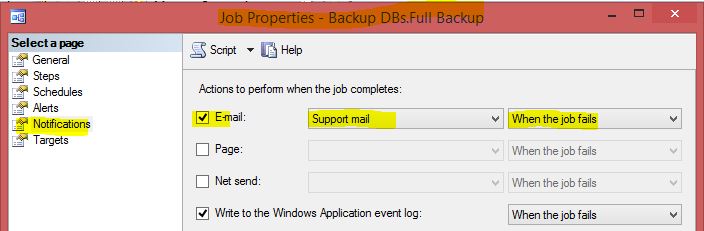
Instead of creating a Notify Operator Task in the maintenance subplans we will use the existing notification function to the SQL server agent job.
Right click the backup job and choose properties. Go to the notification tab and tick E-mail, choose operator and When the job fails.
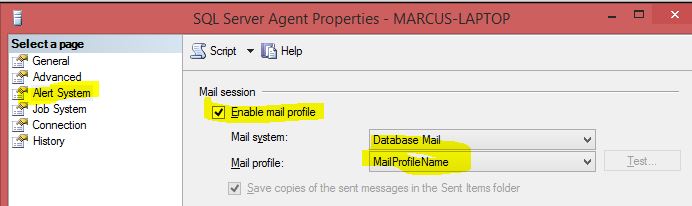
Simple as that! But we have one thing left. We have to activate the mail function to SQL Server Agent.
Right click on the SQL Server Agent and choose the alert tab. Enable the mail profile, choose profile and your done!
Notification Summary
I prefer alternative 1 with creating and adding an Notify Operator Task to the maintenance subplan. Reason, I can choose my own mail text. With alternative 2 you will only get an automated response.
In the next blog post I will talk about setting upp Windows Server Backup.

One response to “Set up backups in Azure part 2 – SQL Backup”